Getting the thickness of coatings right on site is a big deal, especially when you're dealing with things like intumescent coatings. It's not just about making things look good; it's about making sure they actually work as intended, particularly when fire protection is involved. This article will walk you through how to measure, record, and double-check that wet film thickness (WFT) to avoid any nasty surprises down the line. We'll look at the tools, the methods, and why getting it spot on matters so much.
Key Takeaways
- Understanding how wet film thickness (WFT) affects the performance of coatings is the first step to getting it right.
- Various tools, like comb gauges, are available for measuring WFT on site, and knowing how to use them properly is important.
- Properly documenting and verifying your WFT readings helps ensure the coating meets the required specifications, especially for demanding applications like intumescent coatings.
- Common mistakes can happen during WFT measurement, so knowing best practices for checking and verifying is key to accuracy.
- For intumescent coatings, achieving the correct wet film thickness is vital for their fire protection capabilities; getting it wrong can compromise safety.

Understanding Wet Film Thickness Measurement
Right then, let's get down to brass tacks about wet film thickness, or WFT as it's commonly known. It's not just some technical jargon; it's actually a pretty big deal when it comes to making sure your paint or coating does its job properly. Think of it like this: if you're building something, you need the right amount of material, not too little and not too much. The same applies here.
The Role of Wet Film Thickness in Coating Performance
So, why all the fuss about WFT? Well, the thickness of a coating when it's still wet directly influences how it behaves once it dries. Get it wrong, and you could be looking at all sorts of problems down the line. Too thin, and it might not offer the protection it's supposed to – think rust creeping in or the colour fading faster than you'd like. Too thick, and you might end up with drips, runs, or even issues with the coating not hardening correctly. It's all about hitting that sweet spot specified by the manufacturer. This ensures the coating performs as intended, whether that's looking good, resisting corrosion, or providing fire protection.
Principles of Wet Film Thickness Determination
Measuring WFT isn't rocket science, but it does require the right tools and a bit of know-how. The basic idea is to gauge the thickness of the wet coating before it dries. There are a few ways to do this, but they generally involve some sort of gauge that you run over the wet surface. These tools help you get a reading that tells you if you're within the target range. It's a bit like using a ruler, but for paint!
Here are some common methods:
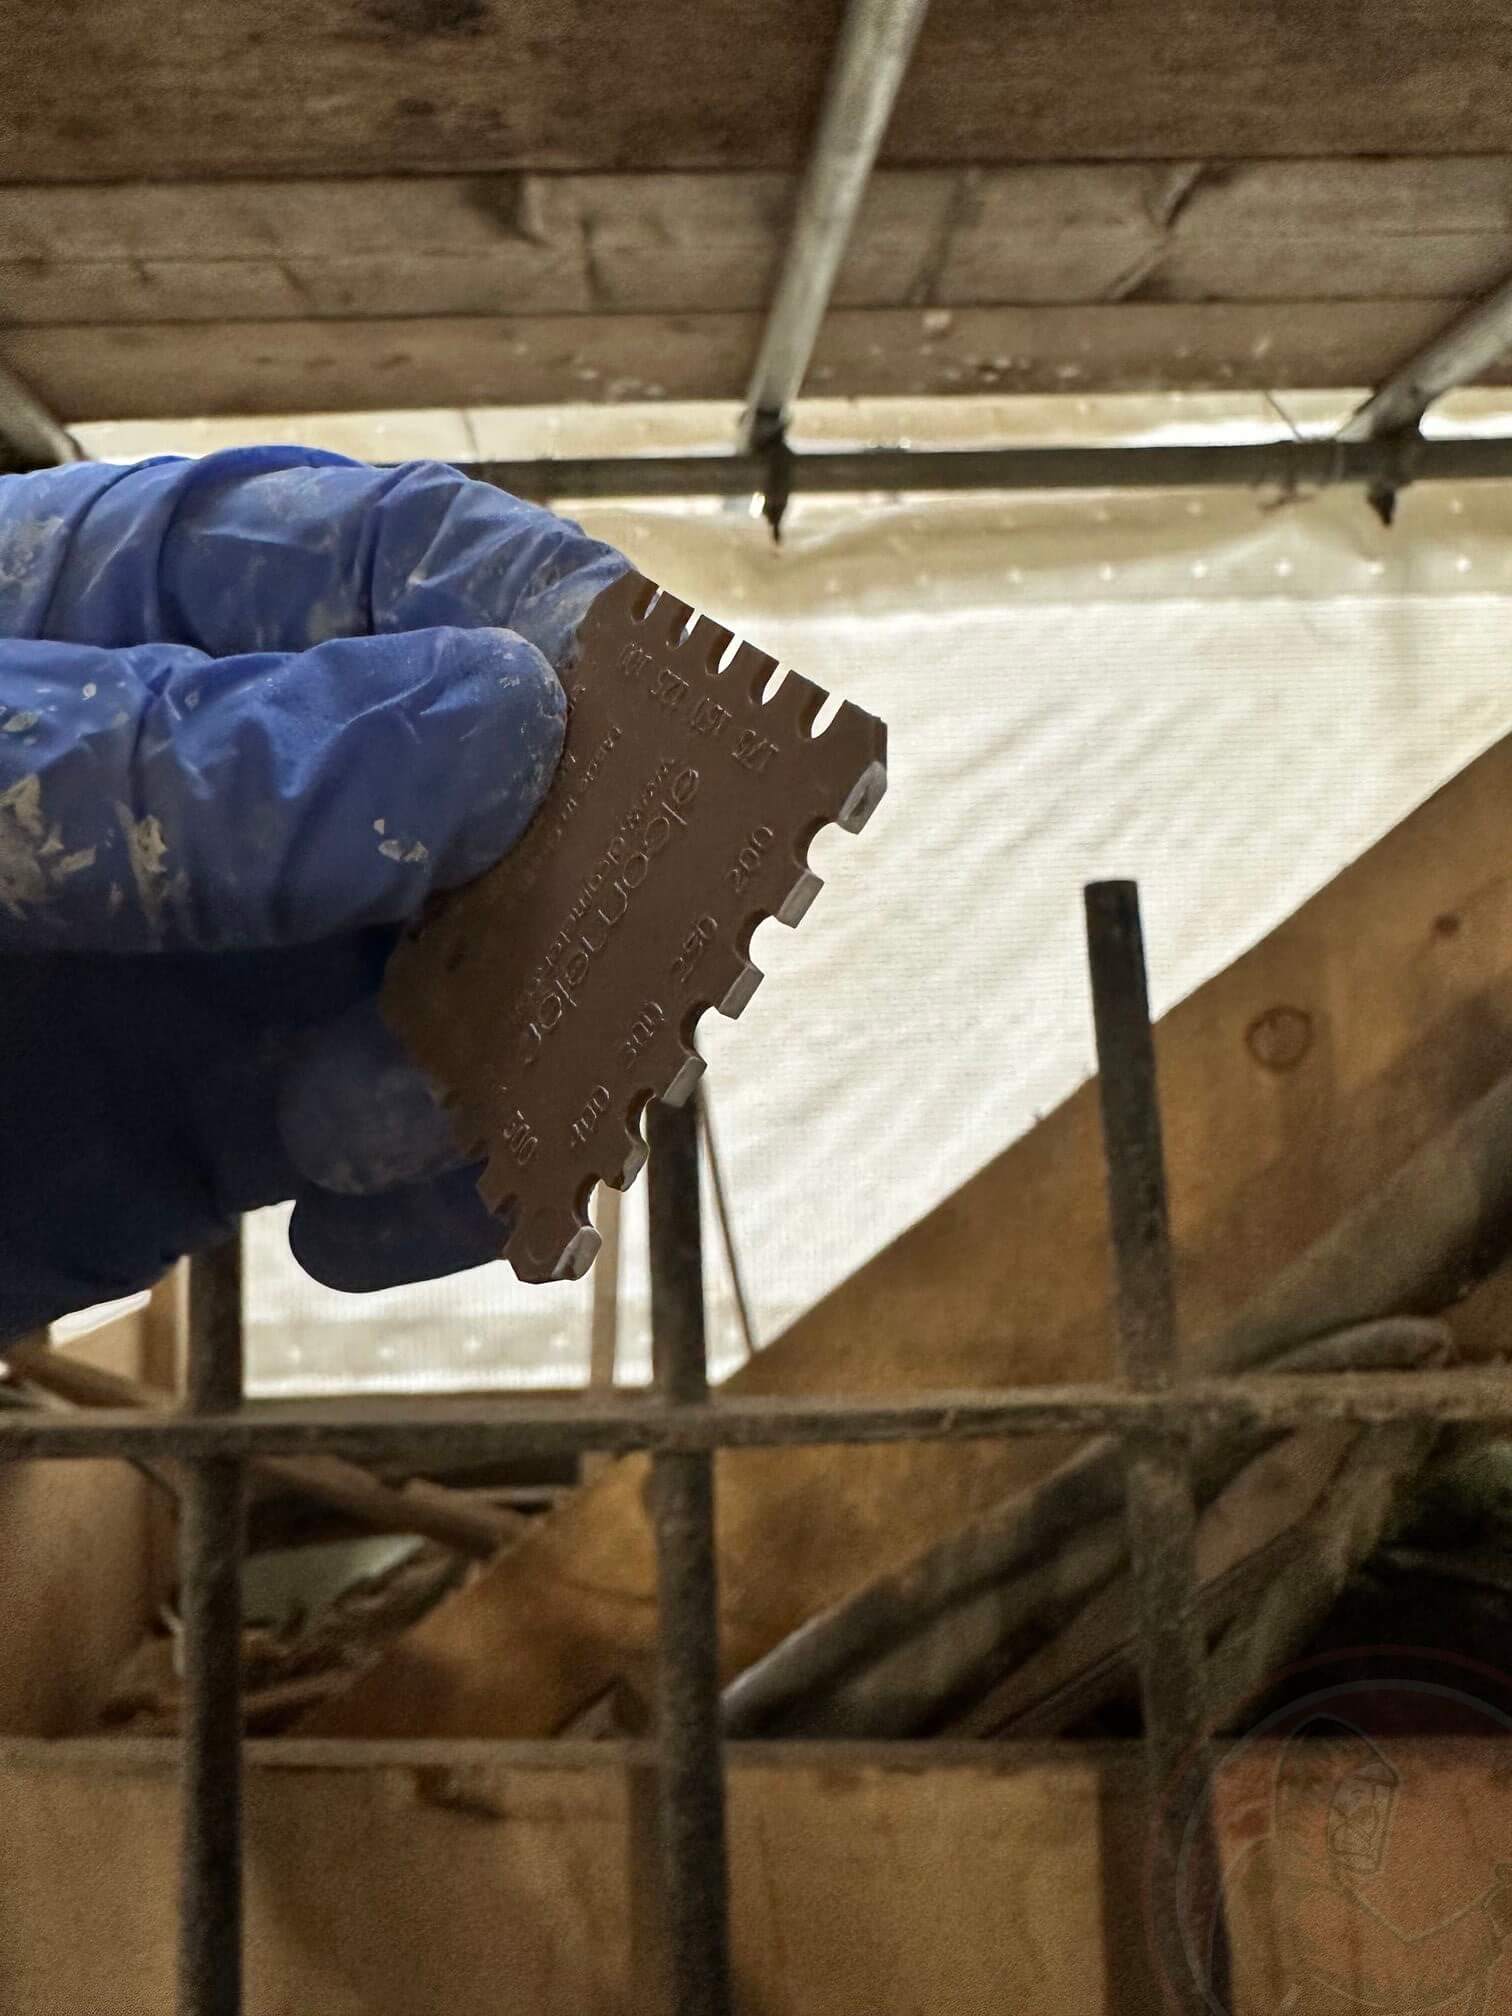
- Comb Gauges: These look a bit like a little rake with teeth of different lengths. You press it onto the wet paint, and the teeth pick up paint to varying heights. By looking at which teeth got paint on them and which didn't, you can estimate the thickness.
- Wheel Gauges: These have a wheel that rolls over the wet surface. As it rolls, it leaves a track, and the depth of that track gives you a measurement.
- Electronic Gauges: More sophisticated versions use electronic sensors to give a digital reading.
Wet Film Thickness Measurement for Intumescent Coatings
Now, when we talk about intumescent coatings – the ones that swell up when exposed to heat to protect what's underneath – WFT becomes even more critical. These coatings are specifically designed to provide a certain level of fire resistance, and this is directly tied to their thickness. If the wet film thickness is too low, the coating won't expand enough to provide adequate insulation during a fire. If it's too high, it might not cure properly or could be uneconomical. So, for intumescent applications, getting the WFT spot on isn't just about appearance; it's about safety.
Getting the wet film thickness right is a bit like following a recipe. You need the exact amounts of each ingredient for the final dish to turn out perfectly. With coatings, the 'ingredients' are the paint layers, and their thickness is key to their performance, especially when fire protection is involved.
On-Site Measurement Techniques for Wet Film Thickness
Right then, let's talk about actually measuring that wet film thickness (WFT) when you're out on the job. It's not just about slapping the paint on; you've got to check it's going on right. There are a few ways to do this, and picking the right one depends on what you're coating and what tools you've got handy.
Utilising Wet Film Thickness Gauges
The most common bit of kit you'll see is a wet film thickness gauge, often called a comb gauge. These are usually small, toothed wheels. You press the gauge into the wet paint, and it leaves marks. The idea is to find the highest tooth that made a clear mark in the paint and the next tooth that didn't. The thickness is somewhere between those two readings. It's pretty straightforward, really. These gauges are inexpensive and give you a quick idea of the WFT on the spot. They're great for getting an immediate check, but you've got to be careful how you use them. Make sure the surface is flat and you're pressing it in evenly. It's a bit of an art, but you get the hang of it.
Interpreting Readings from Comb Gauges
So, you've used the comb gauge. Now what? You're looking for two things: the last tooth that got fully covered in paint, and the first tooth that stayed clean. Let's say tooth number 5 was covered, but tooth number 6 was clean. That means your wet film thickness is somewhere between 5 and 6 units (usually mils or microns, depending on the gauge). You'd typically record this as '5-6'. It's not super precise, but it tells you if you're in the ballpark of what the spec requires. If the spec says 4-7 mils, and you're getting 5-6, you're probably doing alright. If you're seeing 2-3, you know you need another coat, or if it's 8-9, you might need to smooth it out a bit before it cures.
Application of Wet Film Thickness Measurement Tools
Using these tools properly is key. Here’s a quick rundown:
- Preparation: Make sure the surface you're measuring on is representative of the whole job. Sometimes, you might need to apply a bit of extra paint to a small, flat test area if the main surface is too irregular.
- Application: Hold the gauge perpendicular to the surface. Press it firmly and steadily into the wet paint until you reach the substrate or the gauge stops. Don't wobble it around; a smooth motion is best.
- Reading: Carefully examine the gauge. Look for the pattern of paint on the teeth. Identify the last clean tooth and the last marked tooth.
- Recording: Note down the range indicated by the teeth. It's good practice to take several readings in different spots to get an average or to identify any areas that are too thin or too thick.
It's important to remember that these measurements are for the wet film. The final dry film thickness will be less, as solvents evaporate. The amount of reduction varies depending on the paint system, so always check the manufacturer's data sheet for expected shrinkage.
Recording and Verifying Wet Film Thickness Data
Documenting Wet Film Thickness Readings
So, you've taken your wet film thickness (WFT) readings. What now? Simply jotting them down on a scrap bit of paper isn't going to cut it, especially if you need to prove the job's done right. Proper documentation is key. Think of it as your project's diary for the coating application. You need to record the date, time, location on the structure, the specific coating being applied, and of course, the WFT reading itself. It's also a good idea to note the applicator and the inspector who took the reading. This level of detail helps track progress and identify any issues quickly.
- Always use a consistent format for your records.
- Record readings from multiple points on each surface.
- Note any environmental conditions that might affect the coating, like temperature or humidity.
Verification Procedures for Accurate Measurements
Just because you've got a reading doesn't mean it's automatically correct. Verification is where you double-check your work. This involves a few things. Firstly, making sure your WFT gauge is calibrated. Most manufacturers suggest a calibration check every 12 months, but depending on how much you use it and the conditions, you might need to do it more often. You can verify the gauge's accuracy using known standards, like special shims or coated panels with pre-set thicknesses. This quick check confirms the gauge is working as it should and that you're using it properly.
It's easy to get complacent with measuring tools, but regular verification stops small errors from becoming big problems down the line. Think of it as a quick health check for your measuring equipment.
Ensuring Compliance with Coating Specifications
Ultimately, all this measuring and recording is about making sure the coating job meets the requirements set out in the project's specifications. These specs will tell you the target WFT range, and sometimes even the maximum allowable WFT. Your recorded data needs to show that the applied coating falls within these specified limits. If your readings are consistently too high or too low, you'll need to adjust the application process. This might mean changing the spray gun settings, the speed of application, or even the thinning ratio of the paint. The goal is to achieve a consistent and compliant coating system that will perform as intended.
Here's a quick rundown of what to check:
- Target WFT Range: Does your recorded data fall within the specified minimum and maximum values?
- Consistency: Are the readings consistent across the surface, or are there significant high and low spots?
- Specification Adherence: Does the overall WFT meet the project's requirements for durability, protection, or fire resistance?
Challenges and Best Practices in Wet Film Thickness Assessment
Getting the wet film thickness (WFT) just right on site can sometimes feel like a bit of a juggling act. It's not always as straightforward as it looks in the training videos, and a few common issues can pop up.
Common Pitfalls in Wet Film Thickness Measurement
One of the biggest headaches is simply not having the right tools for the job, or worse, using them incorrectly. For instance, relying solely on comb gauges without understanding their limitations can lead to inaccurate readings. These gauges give a general idea, but they aren't the most precise instruments, especially on uneven surfaces or with certain types of coatings. Another common problem is not taking enough readings. A single measurement might be misleading; you really need to take several across the coated area to get a true picture. Surface preparation also plays a massive role; if the surface isn't properly prepared, it can affect how the coating lays down and, consequently, how you measure its thickness. Finally, environmental conditions like temperature and humidity can subtly influence both the coating's behaviour and the gauge's performance, something often overlooked.
Strategies for Accurate Wet Film Thickness Verification
To avoid these pitfalls, a few strategies can make a big difference. Firstly, always use calibrated measuring equipment. Just like any tool, gauges need to be checked regularly to ensure they're giving accurate results. Secondly, adopt a systematic approach to taking measurements. This means defining specific locations and frequency for WFT checks before you even start applying the coating. A simple grid pattern across the surface is often effective. It's also wise to use a combination of measurement methods if possible. For example, using a comb gauge for a quick check and then following up with a more precise method on critical areas can provide better confidence. Training is another key element; ensure everyone involved understands the correct procedures and the importance of accurate WFT.
The Importance of Timely Wet Film Thickness Checks
Checking the WFT while the coating is still wet is absolutely vital. It's your chance to make immediate adjustments. If you wait until the coating has dried, correcting an issue can be a much bigger, more expensive job, potentially involving stripping and re-coating. This is particularly true for intumescent coatings, where the dry film thickness (DFT) is directly linked to fire performance. Getting the WFT right the first time saves time, money, and ensures the coating does its job properly.
Here’s a quick rundown of why timing matters:
- Immediate Correction: Spotting a too-thin or too-thick application while it's still wet allows for instant adjustments.
- Cost Savings: Reworking or stripping and re-coating is significantly more expensive than a minor adjustment during application.
- Performance Assurance: For critical coatings like intumescents, correct WFT is directly tied to their ability to perform under fire conditions.
- Reduced Waste: Minimising the need for re-work also means less material waste and less disruption.
Waiting until the coating is dry to discover thickness issues is a common mistake that leads to significant problems. It's far better to be proactive and check the wet film thickness regularly during application. This simple step can prevent a cascade of costly and time-consuming remedial actions down the line, ensuring the project stays on track and the protective coating performs as intended.
The Significance of Wet Film Thickness for Intumescent Coatings
When we talk about intumescent coatings, getting the thickness right is a really big deal. It's not just about making things look good; it's about fire safety. These coatings are designed to swell up when exposed to heat, creating a protective char layer that insulates the steel structure underneath. If the wet film thickness (WFT) isn't applied correctly, this whole process can go wrong.
How Wet Film Thickness Impacts Intumescent Coating Functionality
Think of it like this: the coating needs a certain amount of material to do its job. Too little, and it won't swell enough to provide the required fire resistance. Too much, and you can run into other problems, like cracking or poor adhesion, which also compromise its protective qualities. The specified thickness is directly linked to the fire rating the coating is designed to achieve. For example, a coating might be tested and certified to provide 60 minutes of fire protection at a specific dry film thickness (DFT), which is derived from the wet film thickness. If you apply it thinner, you might only get 30 minutes, or even less. It's a direct trade-off.
Achieving Optimal Intumescent Coating Performance Through WFT Control
Controlling the WFT on site is where the real work happens. It involves careful application and constant checking. Here's a breakdown of what's important:
- Accurate Application: Using the right equipment and techniques is key. Whether spraying or trowelling, the applicator needs to be skilled and aware of the target thickness.
- Regular Measurement: Using a wet film thickness gauge immediately after application allows for real-time adjustments. If you're falling short, you can add more material. If you're going too thick, you might need to smooth it out or be mindful for the next pass.
- Environmental Factors: Temperature, humidity, and airflow can affect how the coating behaves during application and drying, influencing the final DFT. You need to account for these.
- Material Properties: Different intumescent products have different solid contents and application characteristics. Always follow the manufacturer's instructions for their specific product.
The performance of intumescent coatings is not just about the product itself, but critically about how it's applied. The wet film thickness is the primary indicator that the correct amount of material is being applied to achieve the desired fire protection. Without diligent WFT control, the entire fire safety strategy could be compromised, leaving structures vulnerable.
Critical Wet Film Thickness Parameters for Fire Protection
When you're dealing with intumescent coatings, the manufacturer will provide a specific range for both wet and dry film thickness. These aren't just suggestions; they are based on rigorous testing. For instance, a common requirement might be a DFT of 15-20 mils (0.38-0.51 mm). This translates to a specific WFT range that needs to be achieved during application. It's vital to understand that the WFT is what you measure before the coating dries and shrinks. The relationship between WFT and DFT is determined by the coating's volume solids content. A coating with 80% volume solids, applied at a WFT of 10 mils, will result in a DFT of 8 mils (10 mils x 0.80). Therefore, knowing the volume solids is just as important as knowing the WFT itself. You can find more information on coating performance and how thickness plays a role.
Wrapping Up
So, there you have it. Measuring wet film thickness on site might seem like a bit of a chore, but it's really not that complicated once you get the hang of it. Using the right tools and making sure you record everything properly means you're not just ticking a box; you're actually making sure the job's done right. It helps avoid costly mistakes down the line and keeps everyone happy, from the applicator to the client. Just remember to keep it simple, use the gear you've got, and double-check your readings. It’s all about getting that coating just right.
Frequently Asked Questions
What exactly is wet film thickness (WFT)?
Wet film thickness is basically how thick a coating is right after it's applied, but before it dries or cures. Think of it like measuring the thickness of wet paint on a wall before it hardens. It's a crucial step because it helps ensure the coating will perform as expected once it's fully dry.
Why is measuring WFT so important for intumescent coatings?
Intumescent coatings are special paints that swell up when exposed to heat, forming a protective char layer to shield the underlying material from fire. The thickness of this wet layer is vital; if it's too thin, the coating won't swell enough to provide adequate fire protection. Getting the WFT right on site is key to making sure these safety coatings do their job properly.
What tools are commonly used to measure WFT on a building site?
The most common tools are called 'wet film thickness gauges'. These are often small, toothed wheels or combs. You roll them over the wet coating, and the way the teeth mark or pick up the paint tells you the thickness. There are also electronic gauges that can provide a more precise reading.
How do I read a comb gauge correctly?
A comb gauge has teeth of different lengths. After you roll it through the wet paint, you look at which teeth have paint on them. The WFT is usually between the last tooth that's completely covered in paint and the next tooth that's clean or only has a little bit of paint. It takes a bit of practice to get the hang of it!
What happens if the WFT is measured incorrectly?
If the wet film thickness is wrong, it can cause big problems. If it's too thin, the coating might not protect the surface properly, whether that's from fire (for intumescent coatings) or just general wear and tear. If it's too thick, it can lead to issues like slow drying, sagging, or even the coating not curing properly, which weakens its performance and can lead to costly repairs or re-coating.
How should WFT measurements be recorded and checked?
It's important to write down every measurement you take, noting the date, time, location, and the reading itself. This record acts as proof that the job was done correctly. Often, a supervisor or an independent inspector will also check these measurements to make sure they are accurate and meet the project's requirements. This verification step is crucial for quality control.


.png)